Cutting window tint on a vinyl cutter is particularly challenging and requires patience and some trial and error. The window tint material is very fragile. It also contains metals and ceramics that will dull blades quickly. Below are some bullet points that one should follow when cutting window tint.
First, the definition of ‘bunching’. Bunching is when the material doesn’t slide under the blade at the speed that the cutter is driving the material. Instead, the material will wrinkle between the drive rollers and the blade. Window tint and heat transfer material are particularly susceptible to bunching.
1) POSITION – Place the window tint in the cutter so as to minimize the amount of material the overhangs the left and right rollers. Cutting too far beyond the roller support points can increase the tendency of the material to bunch.
2) WEIGHT – Window tint is very light weight and is sometimes reverse wound. Because of this, you may need to add weight to the front edge of the tint to allow the tint to properly conform to the profile of the cutter deck. We recommend 3 or 4 binder clips to be placed along the front edge if needed.
3) ALIGNMENT – For alignment, roll out the tint you need in advance of the cut. Watch the right edge of the tint as you roll it. When properly aligned parallel with the rollers, the tint should wobble within 2 marks on the ruler. If it wobbles or moves left to right, rotate it and roll again. Initially, you may find this difficult. With some practice, you should be able to get the material aligned well within 3 or 4 trials.
4) BLADE EXTENSION – Make sure you have enough extension of the blade for the tip of the blade to get to the cutting strip. When cutting thick materials, we elevate the blade holder with a rubber O-ring for clearance. For window tint, this O-ring is likely not needed.
5) ROLLERS – The rollers should have firm pressure and as even as possible.
6) CUTTING STRIP – Cutting window tint is extremely sensitive to the integrity of your Teflon cutting strip. Even a slight scratch in the strip can cause non-uniform cutting in the tint. Always check your cutting strip with your finger for uniformity and flip it over or replace it as needed. We recommend that you keep a spare cutting strip on hand at all times.
7) BLADES – Because window tint is very unforgiving on blades due to the material contents, your blades will wear quickly. With standard OEM blades, it is likely that you will get 30-50 windows cut per blade. The blades used for window tint should be the most gradual cutting angle available which is 20°-30°. You can buy the blades in bulk to reduce the cost per window for blades. Alternatively, consider purchasing hardened high quality blades. Contact us for blade recommendations if needed.
8) SPEED – Window tint should be cut at lower speeds. We recommend somewhere in the neighborhood of 200 mm/s.
9) FORCE – Perhaps one of the more frustrating parameters for cutting window tint successfully is setting the blade force. This is set by trial and error and is usually a lower value than cutting sign vinyl. Setting the force too high will result in bunching. Setting the force higher than needed will result in worse tracking. Setting the force too low won’t cut through the material. There ends up being a very small range on the force scale that will produce acceptable results. You will also find that as your blades wear, you will need to gradually increase the force. We recommend starting the force off low, maybe around 60 or so and increasing the force until you get good cuts (this is a conservative way to do this so as not to damage the cutting strip in the process). Keep in mind that sometimes too low of a force won’t actually cause the blade to drop as the return spring force needs to be overcome. Just continue to increase the force until you get good test cuts using the test cut button.
10) CUTTER – Because of the delicate nature of window tint material, we recommend a servo cutter be used due to the smoother motion associated with servo motor control. In order of performance for window tint, consider the following cutters:
1 – Graphtec FC9000 Series
2 – GCC Jaguar V
3 – Saga Precision P1400II or P1400IIP
4 – Saga Standard 1350II or 1350IIP
5 – Saga Precision P1400I
6 – Saga Standard 1350I
7 – Creation CR1201 or CR1300
Please note, if you plan on using the CR series cutters for window tint please be aware that they have been tested with and function with VinylMaster, Flexi and SignCut Pro 1.96. Many tint programs work within Flexi or can export their templates to one of these cutting programs. TintTek 20/20 is one such program. There are many others. If the tint program you would like to use does not work with one of these 3 verified software packages then please choose an alternate cutter that is directly compatible with the tint software you prefer to use.
Here are a few videos for cutting tint with the CR1201 / CR1300:
https://www.cutterpros.com/video/tint-cr-part-1.MOV
https://www.cutterpros.com/video/tint-cr-part-2.MOV
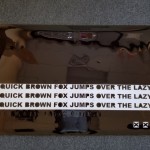
Below are example pictures of tint cut with a Creation CR1300 vinyl cutter:


Leave a Comment
You must be logged in to post a comment.